cookie+springboot的简单示范

在web项目开发中,会话维持是被经常使用到的技术。但是现在有的博客里有和springboot结合的比较少,有完整代码的就更难找到了,于是最近我会抽时间写下与之相关的技术。
简介
cookie保存在浏览器中,可以用于存储描述用户/服务端信息。网站的cookie在浏览器一经设置,此后再向该网站发送请求时,均会带上cookie信息。由于这个原因它在会话维持中,被使用的特别广泛。比如:某一购物网站,在用户登陆时,服务端要求浏览器保存一条能唯一标识用户身份的信息,此设置完成后,用户进行诸如查看个人信息、订单的时候均会自动带上此cookie。
分类
1. 存储位置
- 内存:存储于内存中的cookie,当浏览器关闭时便会丢失。
- 硬盘:存储于硬盘中的cookie
默认均为内存cookie,能保存于硬盘的cookie限制条件会比较多。
2. 维持时间
- 长期:有效期很久
- 短期:有效期比较短暂
当然,cookie的有效期是可以认为设置的,下面的代码中也会有提及到,详细的可以查看这里。
其他属性
- secure :是否要求通过https传递cookie
- Size:大小的设置
- http:要求只有http请求头中带有cookie
- expires/Max-Age:超时时间
- domain:可以访问此cookie的域名
- path:只有域名的该路径下的页面可以访问cookie
- name:键
- value:值
上手
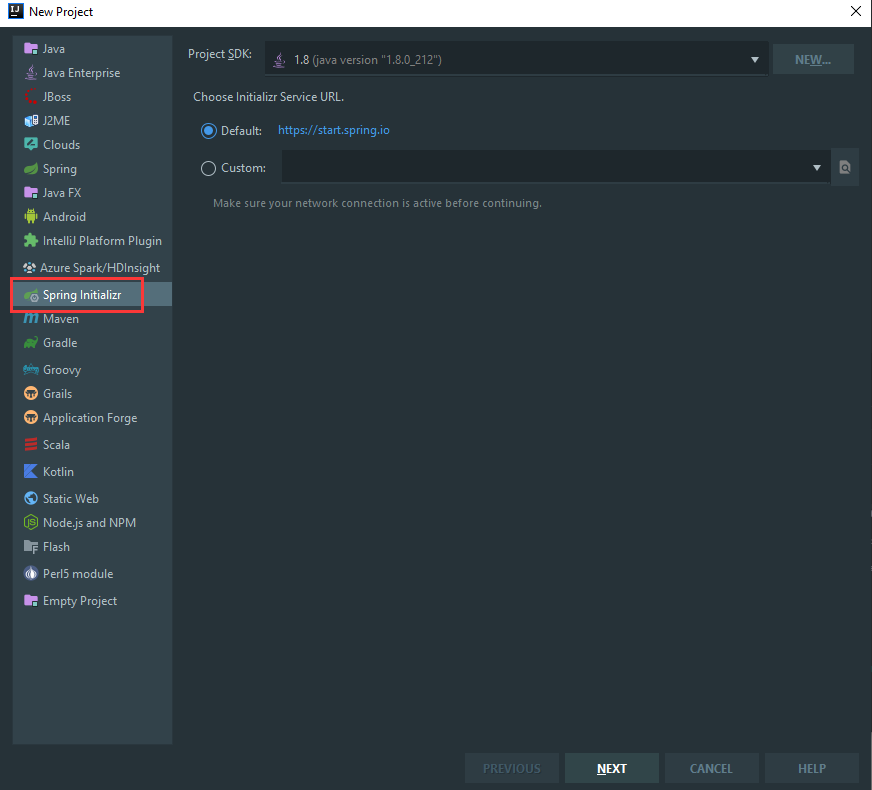
使用idea建立springboot项目
一路点下去即可:
在pom.xml中导入依赖
 <dependency>
            <groupId>org.springframework.boot</groupId>
            <artifactId>spring-boot-starter-thymeleaf</artifactId>
        </dependency>
        <dependency>
            <groupId>org.springframework.boot</groupId>
            <artifactId>spring-boot-starter-web</artifactId>
        </dependency>

        <dependency>
            <groupId>org.springframework.boot</groupId>
            <artifactId>spring-boot-starter-test</artifactId>
            <scope>test</scope>
        </dependency>
配置web
	#thymeleaf:
#前缀 注意最后的“/”
spring.thymeleaf.prefix=classpath:/templates/
#后缀
spring.thymeleaf.suffix=.html
#类型
spring.thymeleaf.servlet.content-type=text/html
#语法
spring.thymeleaf.mode=LEGACYHTML5
#模板缓存
spring.thymeleaf.cache=false
#静态文件位置
spring.mvc.static-path-pattern=/static/**
建立index.html和index.js文件
项目目录为:

//向后台服务器发送请求cookie的请求
function setCookie() {
    $.ajax({
        url:"/cookies",
        type:"POST",
        success:function (result) {
            alert(result);
        }
    })
}

//向后台服务器发送字符串的同时获得cookie
function sendWithCookie() {
    $.ajax({
        url:"/cookies/sessionID",
        type:"GET",
        success:function (result) {
            alert(result);
        }
    })
}
<!DOCTYPE html>
<html lang="en">
<head>
<meta charset="UTF-8">
<title>cookie学习</title>
<script src="https://cdn.bootcss.com/jquery/3.4.1/jquery.min.js"></script>
<script src="/static/index.js"></script>
</head>
<body>
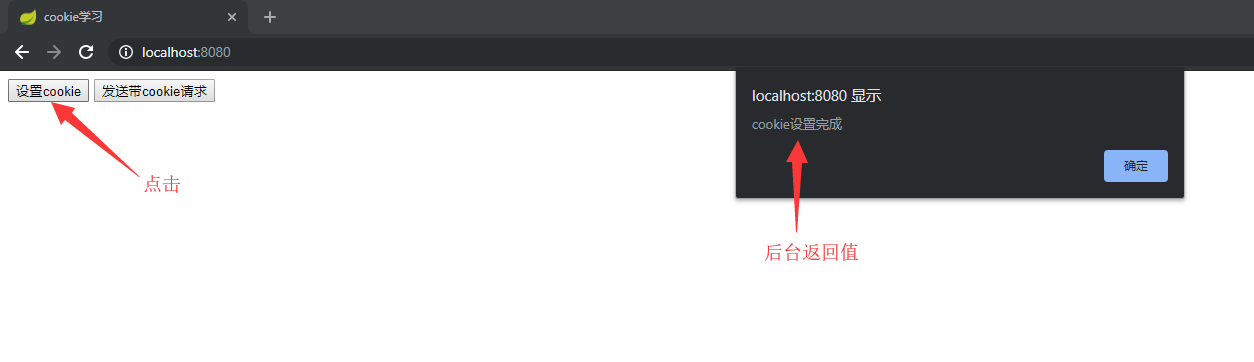
<button onclick="setCookie()">设置cookie</button>
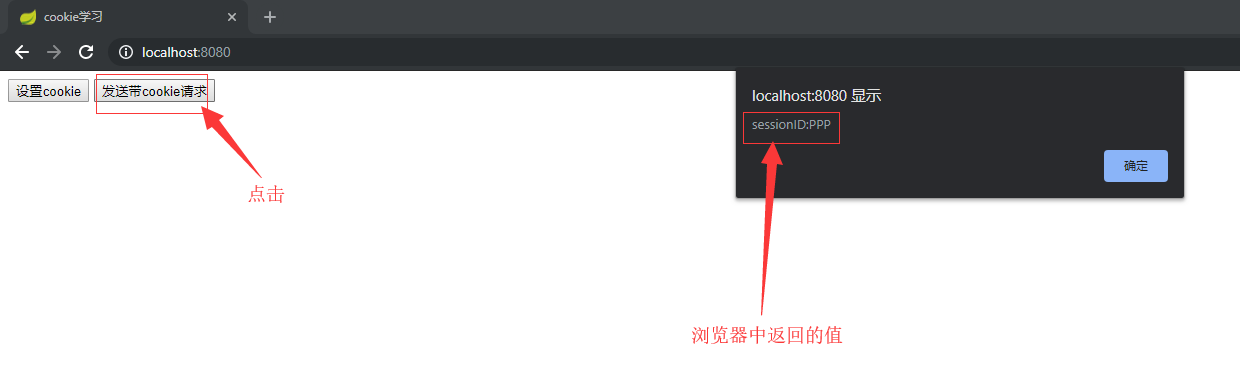
<button onclick="sendWithCookie()">发送带cookie请求</button>
</body>
</html>
建立Controller类
@Controller
public class MainController {
private static final String TAG="MainController";
@RequestMapping("/")
public String index(){
return "index";
}
//获取带有cookie的普通http请求
@ResponseBody
@RequestMapping(value = "/cookies/{key}")
public String getCookies(HttpServletRequest request,
@PathVariable String key){
String result="未获取到sessionID";
Cookie[] cookies = request.getCookies();
if (cookies!=null){
//需要遍历
for (Cookie cookie:cookies){
if ("sessionID".equals(cookie.getName())){
result = "sessionID:" + cookie.getValue();
}
}
}
return result;
}
//设置cookie
@ResponseBody
@RequestMapping(value = "/cookies", method = RequestMethod.POST)
public String setCookies(HttpServletResponse response) {
String result = "服务器出现错误";
response.setStatus(500);
try{
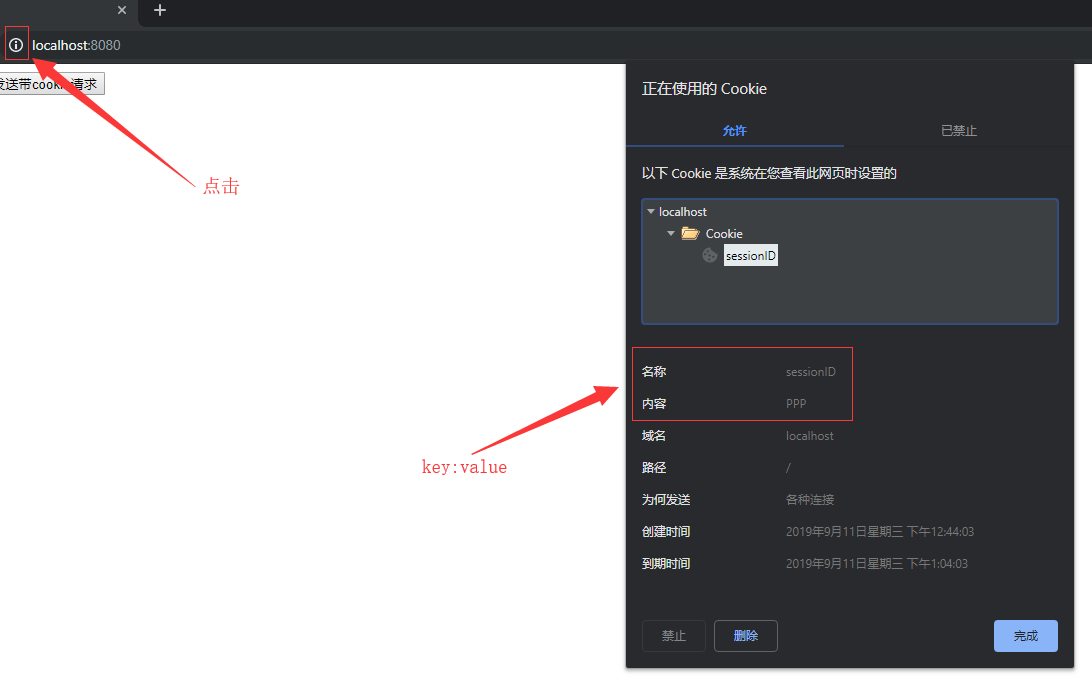
Cookie cookie = new Cookie("sessionID", "PPP");
//设置有效期 单位是秒,不是毫秒
cookie.setMaxAge(20*60);
response.addCookie(cookie);
response.setStatus(200);
result = "cookie设置完成";
}catch (Exception e){
System.err.println(TAG+" :发生错误");
System.err.println(e.getMessage());
}
return result;
}
}
测试